
Buying an Integrated Solar Led Street Light involves more than comparing wattage or choosing the brightest product photo. The panel, battery, LED fixture, and controller must work together for the conditions at the installation site. A shaded road, a long winter night, and a busy parking area place very different demands on one system. Small details matter. Check the usable battery capacity, expected lighting hours, charging time, and whether the lamp can dim when activity is low. These figures help turn a sales claim into a practical comparison.
The ten buying tips in this guide focus on decisions that affect performance over time. They cover light output and distribution, panel placement, battery specifications, weather protection, controls, installation, warranty, and maintenance access. Ask suppliers how their stated runtime was tested, and review the product documentation rather than relying on a headline figure. A product sheet can look convincing, yet still leave important questions unanswered. That deserves a second look. Consider the site’s sun exposure and local weather, and confirm that the proposed system suits the intended road or walkway. No single specification proves a light will work well everywhere. Careful checks before purchase can reduce avoidable surprises and help you choose a system that meets real project needs.
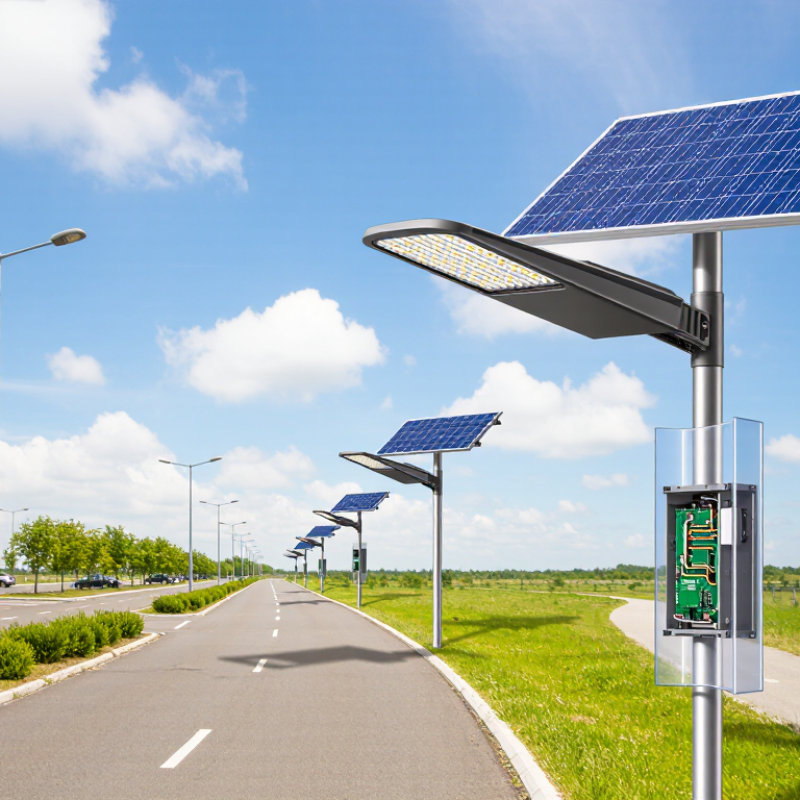
Match the roadway’s actual class before comparing solar street lights. IES RP-8 recommendations vary with roadway function, traffic, pedestrian activity, and the chosen calculation method. Do not copy an illuminance target from a different street type. Check the applicable RP-8 edition and identify whether the design uses illuminance or luminance criteria. Then review maintained average levels and the required uniformity measure. Uniformity matters. A bright patch beneath a pole cannot compensate for a dark crossing or sidewalk.
Tip: Request a photometric layout using the proposed pole spacing, mounting height, and luminaire optics. Compare calculated values with the criteria for the selected roadway class, including the specified uniformity ratio. Ask whether calculations account for light loss over time. For solar fixtures, also check that the expected operating schedule and battery capacity can sustain the designed output. A catalog lumen figure alone is not enough.
Field conditions can make a tidy calculation less tidy. Trees, wet pavement, driveways, and uneven pole setbacks may change what people see at night. I would verify critical locations on site, especially intersections and pedestrian crossings. One easy mistake is judging uniformity by standing directly under a fixture. Review the full calculation grid instead, and revise spacing or optics when dark gaps appear.
P-class pedestrian-area reference levels for maintained average horizontal illuminance.
Commonly referenced P-class benchmarks are approximately P1: 10.8 lx, P2: 6.5 lx, P3: 4.3 lx, P4: 3.2 lx, P5: 2.2 lx, and P6: 1.1 lx. These are pedestrian-area reference values, not universal targets for every roadway. Confirm the applicable IES RP-8 edition and project classification, and check the specified uniformity criterion separately; meeting average illuminance alone does not establish compliance.
When comparing integrated solar street lights, check luminaire efficacy in lm/W, not only the LED chip’s headline figure. A chip may look efficient on paper, while lenses, wiring, and drivers reduce delivered light. Ask whether the stated value was measured for the complete luminaire and at what operating current. Small details matter.
Then request the LED package’s LM-80 report. It records lumen maintenance under controlled conditions at specified temperatures and drive currents; it does not test the whole street light or guarantee years of field performance. Confirm the report matches the exact LED type used. TM-21 projections may help interpret the data, but they are estimates, not service-life promises. Read the conditions carefully.
On a site walk, I would also compare the light distribution and actual illuminance on the pavement. A high lm/W figure cannot fix poor optics or uneven spacing. Solar output changes with season, shade, battery condition, and dimming schedules, so compare products using the same operating assumptions. Ask for the test method and a sample photometric file. If a supplier provides only one impressive number, pause. I have also seen specifications leave the measurement conditions unclear; that should prompt a follow-up, not an automatic rejection.
| # | Buying Dimension | What to Compare | Practical Evaluation Example | Buyer Check |
|---|---|---|---|---|
| 1 | LED and luminaire efficacy | Compare luminaire output in lumens with input power in watts. Do not treat LED-chip efficacy as the efficacy of the complete light fixture. | A 6,000-lumen luminaire drawing 40 W has a calculated luminaire efficacy of 150 lm/W (6,000 ÷ 40). | Request the test report and confirm that both the lumen output and power refer to the same complete luminaire and operating condition. Treat efficacy targets as screening criteria, not proof of lighting quality. |
| 2 | LM-80 lumen-maintenance evidence | Review LM-80 test data for the LED light source, including test duration, drive current, case temperature, and the tested source identification. | LM-80 reports measured lumen-maintenance data for solid-state light sources over the stated test period; 6,000 and 10,000 hours are examples of test durations, not product lifetime ratings. | Check that the tested source and operating conditions are relevant to the proposed luminaire. LM-80 data alone does not establish the lifetime of the complete street light. |
| 3 | TM-21 projections | When a lifetime projection is provided, check the TM-21 method, the underlying LM-80 data, and the reported projection limits. | TM-21 uses LM-80 data to project LED-source lumen maintenance; a projected value is not the same as a directly measured result or a warranty for the whole luminaire. | Ask for the supporting LM-80 report and clearly labeled projection. Do not compare projections as if they were measured hours of complete-fixture operation. |
| 4 | Illuminance and light distribution | Compare photometric files and a project-specific lighting calculation, not lumens alone. Road width, pole spacing, mounting height, and the required lighting class affect the result. | Two fixtures with the same lumen output can produce different roadway illuminance and uniformity because their optics distribute light differently. | Request an IES or equivalent photometric file and verify the design against the applicable road-lighting requirements for the project. |
| 5 | Daily energy budget | Calculate the light’s daily energy use from its actual power profile and operating hours, including any dimming schedule. | A 30 W load operating for 12 hours uses 360 Wh per night before accounting for controller and conversion losses (30 W × 12 h). | Compare energy demand with expected solar harvest and usable battery energy. Ask for the assumptions behind the stated autonomy. |
| 6 | Solar-panel sizing | Assess panel wattage against local peak-sun-hour data, seasonal conditions, shading, and system losses. | Illustrative estimate: a 100 W panel at 4 peak sun hours per day with an assumed 75% net system factor yields about 300 Wh/day (100 × 4 × 0.75). | Compare the estimate with the nightly energy budget. This example is not a site forecast; use local solar data and the project’s worst-season design conditions. |
| 7 | Battery capacity and autonomy | Compare nominal watt-hours, battery chemistry, allowable depth of discharge, temperature limits, and the energy reserved for cloudy periods. | A 12.8 V, 50 Ah battery has 640 Wh of nominal energy (12.8 × 50); usable energy is lower and depends on the battery and system design. | Request usable-capacity and autonomy calculations, including operating temperature and reserve assumptions. Do not equate nominal watt-hours with usable watt-hours. |
| 8 | Controls and dimming profile | Check whether the controller supports the required dusk-to-dawn operation, dimming schedule, low-voltage protection, and recovery after poor solar days. | A documented schedule that reduces output during lower-traffic hours can lower nightly energy demand, provided the required lighting levels are maintained. | Request the control settings and calculate energy use for the full programmed schedule, rather than assuming the fixture runs at one constant wattage. |
| 9 | Ingress protection and environment | Check the stated IP rating for the relevant enclosure and the product’s documented temperature, corrosion, wind, and installation limits. | IP ratings describe protection against access, solid objects, and water under defined test conditions; they do not by themselves establish resistance to corrosion or every outdoor hazard. | Confirm which components the rating covers and review test documentation. Match environmental requirements to the actual site conditions. |
| 10 | Warranty, replaceability, and service | Compare warranty coverage and exclusions for the luminaire, battery, panel, and controller, along with replacement-part availability. | Battery service life and warranty terms may differ from those for the LED light source or fixture; review each component separately. | Request written warranty terms, maintenance instructions, and a parts-replacement plan. Confirm who handles service and how failures are reported. |
Start with measured energy, not fixture wattage alone. A 60 W light running at full output for 12 hours uses 720 Wh nightly. Dimming schedules change that figure. Estimate panel size with this formula: daily Wh ÷ (design-month peak-sun-hours × net system factor). At 4.5 peak-sun-hours and a 0.70 factor, 720 ÷ (4.5 × 0.70) gives about 229 W. Treat it as a starting point, not a guarantee.
NREL’s PVWatts documentation uses a default 14% system-loss assumption for modeled PV systems. That is useful context, but not a ready-made factor for an off-grid street light. Battery charging, controller efficiency, heat, dust, and wiring losses matter too. Use monthly, location-specific solar data rather than an annual average. The World Bank and ESMAP’s Global Solar Atlas provides long-term solar-resource data and PV-yield estimates. Choose the weakest-season sun hours for sizing. Leave some margin. I would still inspect the site after installation; a neat calculation can miss a tree shadow across the panel late in the day.
Do not choose an integrated solar street light by battery amp-hours alone. Amp-hours hide voltage; watt-hours (Wh) show stored energy more clearly. Estimate nightly demand from the LED’s actual dimming schedule, not just its maximum rating. For example, a 30 W lamp running at full output for five hours uses 150 Wh before controller and wiring losses. If it dims after midnight, calculate each operating period separately. Small details matter. Ask for usable battery capacity in Wh, since advertised capacity may include energy the system should not routinely discharge.
Compare usable energy with the site load and required autonomy: the number of nights the light must operate without meaningful solar charging. A two-night target needs roughly twice the nightly energy, plus an allowance for conversion losses and battery aging. Cold weather can reduce available capacity. Shade, dust, and winter sunlight affect recharging, not just storage. Check the stated depth of discharge and test conditions. A spreadsheet can still be wrong if the actual dimming profile differs. I would size from measured night hours and a conservative load rather than trust a neat catalog figure. If capacity is listed only in Ah, request the battery voltage and usable Wh.
When buying an integrated solar LED street light, treat IP65 as a claim to verify, not a guarantee. Under IEC 60529, IP6X means dust-tight, while IPX5 indicates protection against water jets. It does not mean the light can be submerged. Ask for the test report for the complete luminaire, including the battery compartment, cable glands, and seals. Check that the tested configuration matches the product being quoted. A rating on a box is not enough.
For the PV module, request documentation identifying its exact model and confirming testing to IEC 61215 and IEC 61730. IEC 61215 covers design qualification and type approval; IEC 61730 addresses module safety qualification. Compare the report or certificate details with the module label. Small differences in model codes can matter. Also ask who issued the documentation and whether it applies to the supplied module, not just a similar product. Keep the answer in writing.
Look closely at the installation details. A loose gland or pinched gasket can undermine water protection after assembly. Ask how the supplier maintains the rated enclosure when the panel, bracket, and wiring are fitted. If the light will face coastal spray, heavy dust, or frequent pressure washing, discuss those conditions specifically; IP65 alone does not describe every exposure. Paperwork helps, but field installation still matters. I would double-check that part.