Choosing the best car audio amplifier is not about chasing the biggest wattage figure. It is about matching the amplifier to your speakers, head unit, vehicle, and listening habits. S&P Global Mobility reported that the average age of U.S. light vehicles reached 12.6 years in 2024. Longer vehicle ownership can make carefully chosen audio upgrades more appealing, but compatibility still comes first. A powerful unit is no good if it will not fit behind the seat.
Numbers can mislead. J.D. Power’s 2024 U.S. Multimedia Quality and Satisfaction Study examines problems with in-vehicle multimedia systems, a useful reminder that listening quality depends on more than one component. When comparing car audio amplifiers, check continuous RMS power—not just peak power—alongside speaker impedance, channel count, and input options. A small mismatch on paper can mean distorted sound, wasted capacity, or extra installation work. The dashboard matters, too.
This guide explains how to compare specifications and narrow down choices without treating every vehicle the same. Start with your existing speakers and the space available for installation. Then consider whether you need a compact two-channel model, a four-channel unit, or dedicated subwoofer power. Fit comes first. A spec sheet cannot tell you how your cabin will sound, and that uncertainty deserves a little humility. The right amplifier should deliver clean, controlled sound at your usual volume, with room for the music you actually play.
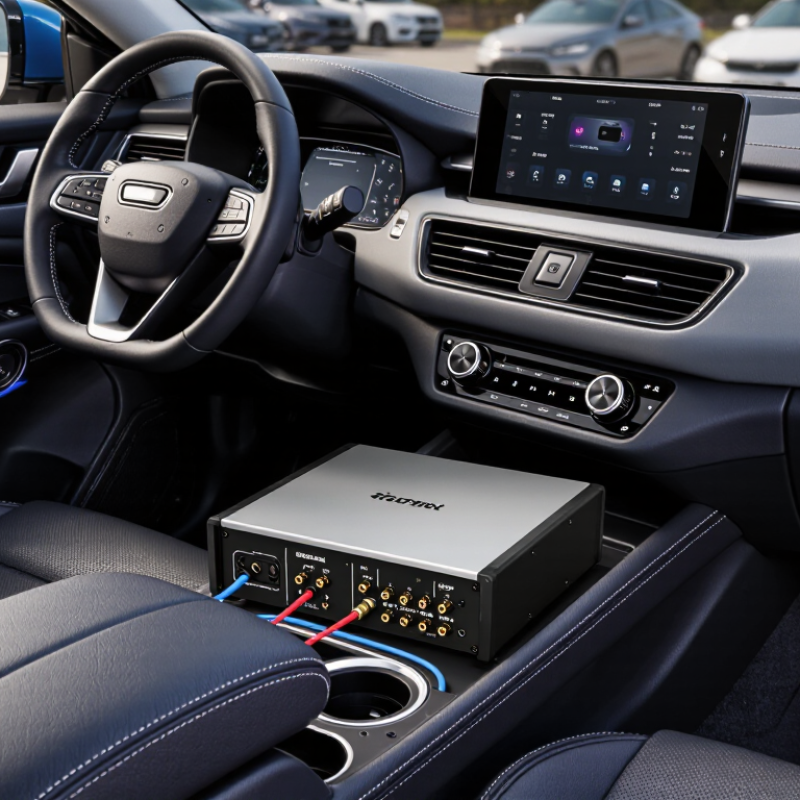
Start with the vehicle, not the amplifier box. Note its year, factory stereo, available mounting space, and whether the electrical system has room for added load. S&P Global Mobility reported that the average age of U.S. light vehicles reached 12.6 years in 2024. That wide age range means factory wiring and stereo outputs can differ substantially. Check the vehicle’s wiring diagram before choosing an amplifier; a tidy fit on paper may still leave too little ventilation beneath a seat.
Then match the amplifier to the speakers you actually own. Read each speaker’s RMS power handling and impedance, not just its peak-watt figure. The CTA-2006-A mobile-amplifier test standard specifies measurement conditions for power ratings, making like-for-like RMS comparisons more useful. Keep the numbers aligned. If the speaker’s impedance changes across its frequency range, the amplifier’s output may change too. This is easy to rush, and a quick guess can be wrong.
Your listening goal matters just as much. Clear vocals at moderate volume call for different tuning than strong bass during long drives. Listen from the driver’s seat, with windows closed, and note what feels weak: front-stage detail, rear fill, or low-end impact. Be realistic about cabin noise and daily volume. A more powerful amplifier will not fix poor speaker placement.
Choosing a car audio amplifier starts with the speaker layout, not the biggest number on a box. A two-channel amplifier can power a pair of speakers, while a four-channel model can handle front and rear pairs. A mono amplifier is usually suited to a subwoofer. Count the speakers you plan to power, then leave room for future changes. A spare channel can be useful, though it may add cost and take up space.
Compare continuous RMS power, not peak power. Match the amplifier’s RMS output to the speaker’s RMS handling range at the same impedance. For example, a speaker rated for 75 watts RMS at 4 ohms should be paired with an amplifier that delivers a suitable output at 4 ohms. More power is not automatically better. Set gains carefully; distorted sound can damage speakers even when the system seems only moderately loud.
Impedance needs close attention. Check each speaker’s ohm rating and the amplifier’s minimum stable impedance before wiring anything. Series and parallel connections change the final load, sometimes more than expected. Bridging channels can increase output, but it may also lower the load seen by the amplifier. Read the manual and verify the wiring plan. Small details matter. A loose ground point or undersized power cable can undermine a carefully matched setup, and I still find it easy to focus too much on wattage alone.
Match the amplifier’s RMS output to your speakers’ impedance, not its advertised peak wattage. Check every channel’s supported load; a 2-ohm speaker can strain an amplifier rated only for 4 ohms. The Consumer Technology Association’s CTA-2006-A standard measures amplifier power under defined conditions, including supply voltage, speaker load, and distortion limits. Compare ratings tested under the same conditions. Small print matters.
Then estimate the current your electrical system must supply. For example, a 500-watt RMS Class D amplifier operating at an assumed 80% efficiency draws about 45 amperes at 13.8 volts. That is before other vehicle loads. Check the alternator’s rated output and existing accessory demand; its full rating may not be available at idle. Follow the amplifier’s fuse and wiring guidance, and account for cable length and current. Battery voltage alone can mislead. Check voltage at the amplifier during loud playback, when a long, thin cable may cause voltage drop, heat, or clipping. I would still leave some capacity in reserve; real music demand and driving conditions vary.
| Compatibility Check | What to Match | Practical Guide | Example or Warning |
|---|---|---|---|
| Speaker impedance | The amplifier’s supported load must match the speakers’ wiring configuration. | Check the amplifier’s rated minimum impedance per channel and, for bridged operation, its bridged-load rating. Account for the final impedance after speakers are wired in series or parallel. | Two 4-ohm speakers wired in parallel present a 2-ohm load. Do not use that configuration unless the amplifier is rated for 2 ohms per channel. |
| RMS power | Compare continuous RMS output with each speaker’s RMS power handling at the same impedance. | Use RMS ratings rather than peak or “maximum” power figures. Choose an amplifier that can deliver suitable clean power without exceeding the speaker’s limits. | A speaker rated for 75 W RMS should be compared with the amplifier’s RMS output at the speaker’s actual impedance—not its peak-power rating. |
| Number of channels | The channel count should suit the speakers and subwoofers you plan to power. | Two-channel models commonly power a pair of speakers; four-channel models can power four speakers; mono models are commonly used for subwoofers. Some multi-channel amplifiers support bridging. | Confirm that bridging is supported and follow the specified minimum bridged impedance before combining channels. |
| Head-unit signal connection | Check the available audio outputs and the amplifier’s input options. | Many amplifiers accept low-level RCA signals. If the head unit has speaker-level outputs, use an amplifier with compatible high-level inputs or an appropriate line-output converter. | Check the head unit’s manual for output type and signal voltage; do not assume every factory system provides RCA outputs. |
| Input sensitivity and system integration | The amplifier’s input range should work with the source unit’s output level. | Input sensitivity is an adjustment range, not a power or volume control. Set gain according to the equipment instructions and avoid using gain to compensate for a poor signal. | Excessive gain can cause clipping, which may damage speakers even when the amplifier’s advertised power seems suitable. |
| Built-in crossovers | Available high-pass, low-pass, or band-pass filters should suit the speaker arrangement. | High-pass filters can reduce deep bass sent to smaller speakers; low-pass filters are commonly used for subwoofers. Filter needs vary with the speakers and system design. | Check whether the amplifier’s crossover frequency and slope can be adjusted as required by the system. |
| Vehicle electrical supply | Consider the vehicle’s charging-system voltage, battery condition, and available alternator capacity. | Amplifier power is drawn from the vehicle’s electrical system. High-power installations may require an assessment of the alternator, battery, wiring, and expected listening level. | Repeated dimming lights or low-voltage shutdowns can indicate an electrical-system or installation issue; a larger amplifier alone will not solve it. |
| Current demand | Estimate current draw using amplifier output power, supply voltage, and efficiency. | A rough full-output estimate is current ≈ output power ÷ (supply voltage × efficiency). Actual draw varies with music, load, amplifier design, and operating conditions. | At 13.8 V and 80% efficiency, 500 W of output corresponds to roughly 45 A at full output: 500 ÷ (13.8 × 0.80). |
| Power cable and fuse | Choose cable and fuse protection according to current demand, cable length, installation conditions, and the amplifier instructions. | The fuse near the battery should protect the power cable. Use cable with adequate current capacity and follow applicable vehicle-installation guidance. | Do not select a larger fuse simply to prevent it from blowing; an oversized fuse may leave the cable inadequately protected. |
| Ground connection | The ground cable should be appropriately sized and securely connected to a suitable vehicle chassis point. | Keep the ground lead short where practical, prepare the contact surface as instructed, and verify a secure, clean connection. | A poor ground can contribute to noise, unstable operation, or voltage drop. |
| Physical fit and cooling | Check the amplifier’s dimensions, mounting location, ventilation needs, and exposure to moisture. | Leave the clearance recommended by the manufacturer and mount the unit where it is protected and can dissipate heat. | A confined or poorly ventilated location may cause thermal protection or reduced performance. |
Choosing an amplifier starts with its class, but efficiency is only part of the story. Class D designs commonly reach about 80–90% efficiency, while Class AB units often produce more heat. Actual results vary with load and listening level. Heat matters. The CTA-2006-D mobile-audio measurement standard gives buyers a consistent framework for comparing rated amplifier power. Check the test conditions, not just the largest number printed on a specification sheet.
Features should solve real installation needs. High-level inputs can connect to factory speaker wiring, while adjustable crossovers help direct bass to a subwoofer. Look for clear gain controls and protection against overheating or short circuits. A useful feature is one you can set correctly. I would still verify compatibility with the vehicle’s existing audio system; specifications can leave out awkward installation details.
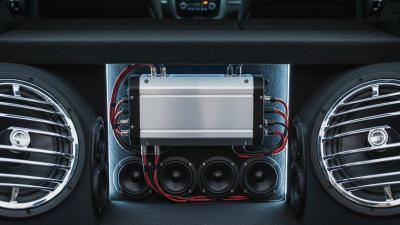
Measure the space before choosing an amplifier. A compact unit may fit beneath a seat, but restricted airflow can raise operating temperatures. Check its dimensions, ventilation clearance, fuse rating, and cable connections. Build quality matters here: a rigid metal chassis, secure terminals, and clean internal assembly are practical signs to inspect. A glossy case proves little. CTA-2006-D ratings help compare output, but they cannot tell you whether the unit will stay cool in a cramped installation.
Before choosing an amplifier, decide how it will fit into your car and who will install it. Check the available space under a seat or in the trunk, and measure the area with a tape measure. Allow room for airflow, wiring, and future access. Measure twice. A powerful amplifier may look attractive on paper, but it is a poor choice if it blocks storage or needs costly modifications. Also check that its channel count and power output suit your speakers and subwoofer.
Set a practical budget for the whole installation, not just the amplifier. Include suitable power and speaker wires, a fuse, mounting hardware, and professional labor if you are not comfortable routing cables or making connections. Ask for an itemized estimate before work begins. A modest system can still need extra parts, especially when the factory audio setup has unusual connections. Keep a small contingency fund for those surprises. It is tempting to spend every dollar on higher output, but clean installation and reliable tuning matter too. My first budget would not be perfect; prices and labor vary, so compare local estimates before committing. Decide which features you will actually use, then leave room for safe installation rather than buying the largest unit that fits.